Nak

Since 19 May 2005
4244 Posts
Camas
Site Lackey
CGKA Member
|
 Fri Oct 14, 22 1:02 am Custom Control Bar For Foiling Fri Oct 14, 22 1:02 am Custom Control Bar For Foiling |
 |
|
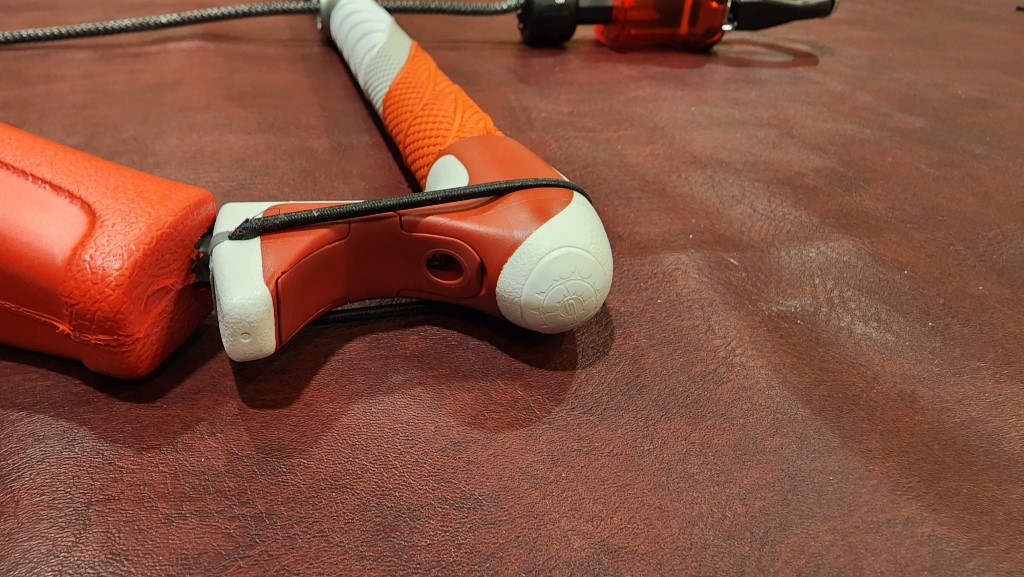
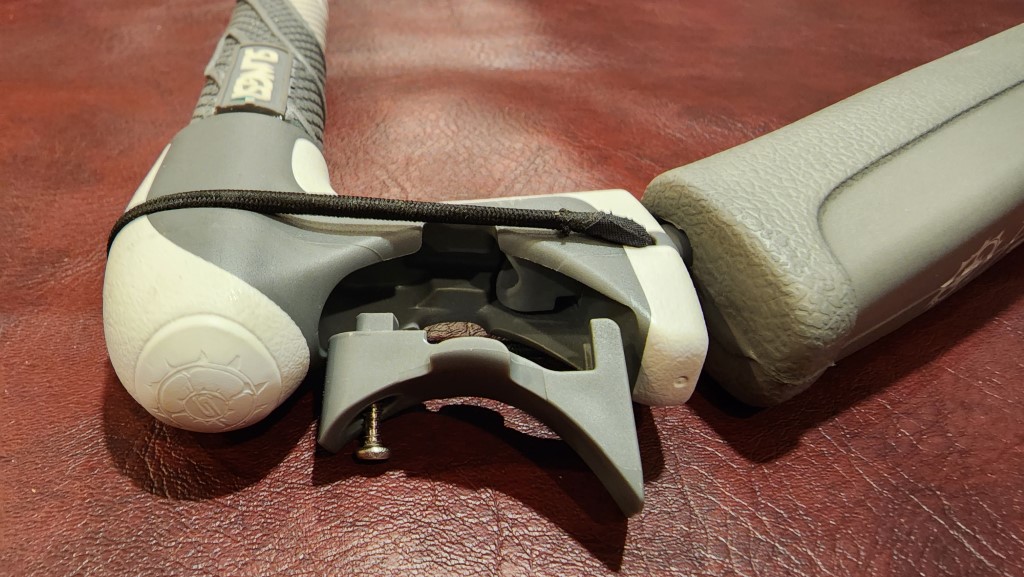
Here's the bar I built for foiling, it is a HUGE improvement over using a standard bar. I've seen all of the usual absolute minimalist bars, and those are great for those who like them. I personally like the robustness of a modern release, so I never tried one of those. Then I saw the bar Fred Hope rides and I thought "I LIKE that!" So that's what inspired this bar. I've gotten rid of all of the extra weight the kite has to carry, but kept things robust that I carry. No trim; I don't need it with the UFO anyways. The difference in flying the kite is just phenomenal! The kite is more reactive, flies better over powered, flies better under powered, flies faster through the window, goes upwind better, goes downwind better, and hangs in the air better in bad lulls. And yeah, it just feels better. Here's the end result.
Parts:
1. 2019 Slingshot control bar. I like this bar a lot for a variety of reasons.
2. Current Slingshot Sentry quick release. I like this release and it's designed for one rope and one safety line.
3. Current Sentry Y Line Splitter. Nice and light.
4. Sentry safety line. I use this to start, and after everything is stretched out I make a custom safety line out of 1000# flying line.
5. Red grab handle for the safety. Millions around, pick one. I like to be able to grab the safety if I need to.
6. Ozone Race lines, 23m.
7. PKS race universal pigtails.
8. 7/64" Amsteel, red and blue, for the steering line leaders. This size is required to fit the bar.
9. 1/8" Amsteel for the center rope. This size is required to work with the Sentry release.
10. 1/8" silicone cord.
11. 900 to 1100 pound SK99 dyneema for the extensions.
12. Slingshot 2010 - 2019 800# pigtail.
All splices are brummel locked.
The first step is to make the center rope out of the 1/8" Amsteel. I splice a loop onto each end and run the bury the full length of the rope, the two tails meet in the rope. I don't taper as when I'm done the diameter is constant for the whole rope. The rope needs to be 30.5" long or close to that, including the eyes. The top eye needs to be 2.5" long, the bottom eye needs to be 1.5" long. The top eye is then mounted to the "Y", run through the bar and the bottom eye is mounted to the release. BE CAREFUL not to drop the little ceramic ball bearings when you take the release apart!!!! They are EXPENSIVE!!! Do this over a towel so they don't bounce away if they do fall, and tape the release up to try and prevent them coming out in the first place. After a couple of sessions the rope will stretch a bit and there will be a gap between the two buries. Insert the silicone cord into the gap to keep the diameter of the rope constant and prevent the rope from wearing out at this junction.
Next, make the steering leaders out of the 7/64" Amsteel. Red for the Left, blue for the right. a 46" final rope will make for 35" leaders. You can modify this, but I would not go any shorter. First mark both ropes for all splices. Make these marks as close as possible to identical on both ropes. You want these ropes to be equal length. If you don't mark them before splicing that will not happen. Mark the ropes 8" from one end, then at 10", 61", and 63" make the bottom splice with the 8" tail. Go ahead and taper. Then make the top splice, and run the bury all the way down to the bottom bury. Pre stretch now with a couple of hundred pounds. Yes the tail is still sticking out. Now you can cut and taper the tail; this will be hidden in the floats. Repeat with the other color. Make sure the two ropes are within 1/4" length. Here's a tip: If one of the ropes is looser, kind of flat, it will end up about 3/8" - 1/2" longer than a rope that feels round and tighter. My red rope is round and tight before working, the blue is more flat. If your rope is like this make your tight rope center section--the 51" section--3/8" longer than the flatter rope. They should end up close. Personally, I'd make a new rope if they are more than 3/8" different after all is done. Pick one, and adjust the center section to try and match the other rope.
The end caps of the bar are held in by one screw each. this screw is at the end, not the one at the bottom. unscrew, attach a string to the leader, pull the old leader out of the float. Attach the string to the bottom of the new leader, pull it back in. The original leader is held in place with a rectangular piece of metal that loops over the holder. That won't work with the amsteel, so just use the eye of the amsteel. Put the end cap back on, being careful to make sure the eye stays on the holder.
Attach the safety to a center line through the Y. Attach the other center line through the Y with the 800# pigtail. Attach the steering lines to the steering leaders. You'll now see that the center lines are about 17" too short. You need to make extensions out of the 1000# SK99 to equalize the line lengths. I make extensions with a long bury on one end and leave 6 inches or so of the tail sticking out. I tune the bar by adjusting the length of these extensions. Attach the universal pigtails. You can fly it like this with no lock, it will hold fine under pressure. Just be careful rigging your kite. After a couple of sessions everything will settle into it's final length. Insert the silicone cord as mentioned earlier, and then tune the bar again. Measure your adjustable extensions and make a permanent set of extensions that length.
Now, enjoy foiling even more than you already do!
 |
| |
20220910_162244 (Custom).jpg |
|
|


